If you once had to grow something in a house or in an apartment on the windowsill, you probably know how difficult it is to care for seedlings at the very beginning, when the sprouts first appeared.

However, sprouts are very easy to keep in the greenhouse. And you can do it yourself from improvised materials. And in this case, the author uses photo frames.
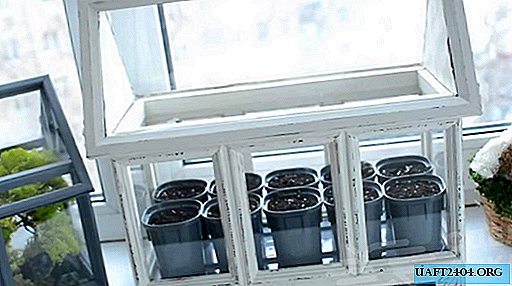
The mini greenhouse itself is quite spacious. In it you can put 10 medium pots. And ordinary plastic cups fit even more. Moreover, the greenhouse has closed ends so that moisture does not evaporate.

Another feature of this greenhouse is a removable roof. This allows you to care for seedlings: water, swap pots, etc. Well and most importantly - a homemade greenhouse looks very original, and order will always reign on the windowsill.

The main stages of work
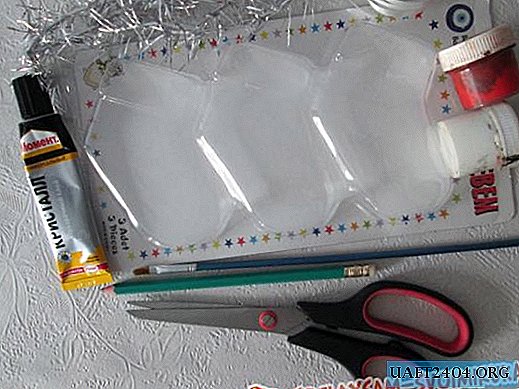
To make this version of a mini home greenhouse, you will need eight wooden photo frames measuring 10 * 15 cm. First of all, you need to remove the glass from them. At this stage, only the wooden base itself will be required.

The long side of the greenhouse will consist of three such frames glued together. For gluing, you can use wood glue or building PVA. We fix the frames with tape or masking tape. You can also use simple clothespin clips.

To make a roof for a greenhouse, the author uses two long rectangular frames. After drying the long sides, glue to them perpendicular to one short frame.

To make the side walls on the roof, cut out two triangles from the fiberboard in size. Since there will be increased humidity inside the greenhouse, an additional PVC film will need to be fastened to the fiberboard pieces so that they do not soak. You can use an old plastic folder or a hard oilcloth for this.

Mini greenhouse assembly
It is necessary to assemble the roof already with glasses, because after assembly they will not be able to put them on. We glue the glass with the help of glue "Moment" or any other contact adhesive.

If desired, you can decorate the side walls of the roof with carved elements. They can be cut out of a plastic basket.
After that, we coat the ends of the triangles from the fiberboard, as well as the short side of the frame with contact adhesive and install the walls. Then we attach the second long frame to the glue. And wait until the glue dries.

In order for the roof to fit firmly on the base, it will be necessary to make a rectangular frame from the rails of a semicircular profile and ordinary rectangular rails. We fasten it to the roof frame with liquid nails, which can also close up all the gaps.
As the bottom of the greenhouse, the author uses a rectangle from the remnants of the furniture panel (plywood is also suitable). The frame of the greenhouse is installed on the base. From above we install a frame of rectangular battens, on which the roof will stand.

Moreover, note that this rectangle should be included in the one that is fixed at the bottom of the roof. After that, you can start decorating the greenhouse (if desired) and painting. For details on how to make a mini greenhouse for seedlings from photo frames, see this video.