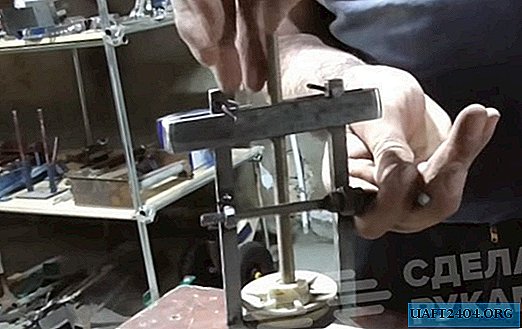
In the process of repairing power tools, household appliances and other mechanisms, it is sometimes necessary to replace worn bearings. Doing this with a hammer, screwdriver or other improvised means is undesirable, since there is a possibility that the axis and thread can be damaged. In this situation, a homemade puller with a modified design is useful.

Powerful puller manufacturing process
From a steel square of 20x20 mm, cut a piece 12 cm long, in the center of which we drill a hole and cut the thread. On both sides with the help of a grinder we make slots, on the edges of which it is necessary to weld “plugs” from short segments of a hexagon or square bar. The surface of the resulting part is carefully cleaned with a grinding disc.
Next, we make the second part of the puller design - from two pieces of a steel square and strip scraps we make side "claws" for gripping the bearing. One nut must be welded to them (approximately in the middle). They are connected with a stud. We also twist a hairpin into the central hole of the first part, the end of which needs to be sharpened slightly under the cone.

Then, after cleaning the surface, we assemble the puller. Using this tool is very simple. First, the bearing is firmly fixed by the lateral "claws", and then removed by twisting the central stud, to the end of which you need to weld a handle or lamb. How to make such a homemade puller for bearings, you can see in the video on the site.