In this review, the author shares a budget version of the plaster (for walls indoors) using a comb.
The decorative plaster itself is traditionally made using screen printing technique. A comb in this case is needed in order to make a substrate for the stencil.
The first step is to mix the putty. Moreover, the author adds powder dye to it, achieving the desired color shade.
Next, putty on the wall surface (in this case, this is an experimental sample).

Using a comb, we form a pattern: first we make transverse furrows, then longitudinal ones.

The main stages of work
At the next stage, using a trowel or putty knife, you will need to slightly smooth the putty (it is advisable to do this while it is still fresh).

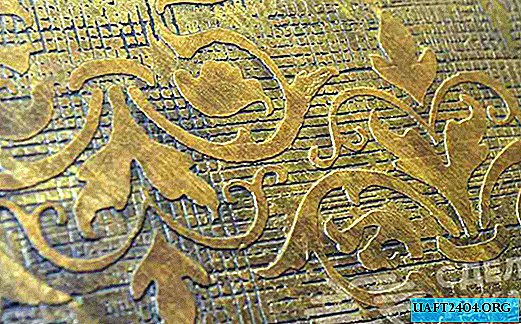
After drying the first layer, using a stencil, the master applies the drawing.

After the second layer has dried, you can start painting, but first you need to primer the surface. The author adds a dye to the primer to even out the color background.

As for the color of the paint, here you can experiment as you like. The author paints the sample with golden enamel.
Then we apply a black color with a sponge and immediately erases it with a dry rag. And it remains only to apply a layer of varnish to the surface.

Details about this budget version of the plaster can be found in the video on our website.