Share
Pin
Tweet
Send
Share
Send
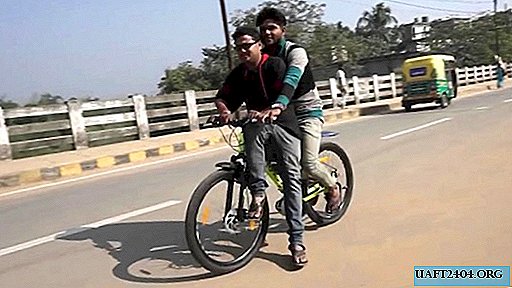
This powerful e-bike is capable of carrying two people safely. Unlike the classic design of an electric bike on a motor wheel, this model uses an asynchronous electric motor. As a result, increased efficiency and a strong initial moment. Although of course in speed he loses a little to his brother. For that, it is tearing straight from place to rearing.

A ready-made electrical kit specially designed for this purpose is installed on this bike. Everything can be bought on Ali Express.

Electric bike kit
- The electric motor is 750 watts.
- Control controller.
- Rechargeable batteries.

In general, such kits are designed for tricycles, but we will adapt it for a two-wheeled one.
Tools and materials
To assemble the electric drive and install it on a regular bike, you need to follow the attached instructions and have a simple set of tools:
- set of wrenches;
- Screwdriver Set;
- electric welding transformer with thin electrodes;
- strip steel with a width of 20 mm and a thickness of 2-3 mm;
- steel angle 25 mm, length up to 100 mm;
- 20 mm steel angle 600-700 mm long;
- detachable sander;
- electric drill with drills for metal, diameter 8.5 mm;
- 8x30 mm bolt with nut and washers, 6 pcs.
- sandpaper;
- paint for metal;
- soldering iron with solder and flux;
- insulating tape,
- Scotch.
Assembly and installation procedure for electric drive
Mechanical part

First, the main bicycle sprocket is dismantled on the carriage. To do this, weaken and remove the chain, unscrew the nuts and take out the sprocket with a protective disk. Remove from the axis of the pedal with connecting rods. In this version of the assembly of the electric bike pedals we do not need. Immediately we put a chain on an asterisk of an electric motor.

The electric motor has 2 corner brackets with holes and is made for mounting on another bike model. Therefore, we need to make special fasteners for mounting the engine on the frame in the area of the carriage.


We cut off a piece of a strip 200 mm long, to it (approximately in the middle) we weld a second piece, 120 mm long, having a bend, the length of which is slightly larger than the main tube of the bicycle frame. We should get a fork that covers the tube frame. From one edge of the plug, we drill 2 holes (the distance between them and the diameters must correspond to the holes on the motor bracket) for fastening the upper motor bracket.


At the opposite ends of our plug, we drill 1 hole. After putting the plug on the frame pipe, the other end is compressed with a bolt and firmly holds the electric motor on the frame.

To fix the lower bracket of the electric motor, cut off the corner (about 70 mm) and weld it to the axis of the carriage. Then we try and designate 2 holes on the corner to connect it to the motor bracket. We drill holes and fasten the lower bracket to the bolts. We clean the welding spots and paint all the fasteners.
The electric motor from this kit has a power of 750 W, so 2 batteries of 12 V are used as a source of electricity, connected in series. As a result, such a battery has a voltage of 24 V and a capacity of 12 Ah.
The batteries are quite heavy and to secure them on the frame of the bicycle, you need to make a frame from a thin corner.

We make measurements and metal cutting. Weld the frame. We clean the seams, paint and dry the frame. We put the batteries in the frame.

To stop the frame with the battery in the frame of the bicycle from the strip, we make a clamp that can move and is attached to the vertical rear tube of the bicycle frame. The front of the frame rests on the inclined tube of the bicycle frame. Moving the clamp, securely press the frame with the battery to the bicycle frame.

We take the tape tape and wind the control unit to the bottom of the frame with the battery, capturing the upper horizontal tube of the bicycle.

Electrical part
For soldering, we connect the batteries in series with a piece of wire in isolation. From the terminals we mount 2 wires (24 V leads). Solder the charging connector.


We connect a loop of wires coming from the bike electric control knobs that are mounted on the handlebar. Connect the wires for soldering, according to their color and diameter. All connections are securely insulated with electrical tape.

Using small bolts, we connect the power wires from the battery to similar wires from the control unit. We hide all connections under an adhesive tape.
We check the operation of the controls and start rolling around the electric bike.

Findings

It is advisable to purchase a kit for equipping a bicycle with an electric drive that matches this model of bicycle. If this is not possible, you will have to do a little work with your hands and head and assemble the electric bike at home.

Share
Pin
Tweet
Send
Share
Send


