Share
Pin
Tweet
Send
Share
Send
Today we offer for consideration one of the most interesting models of furnaces. A rocket furnace or a jet furnace is fundamentally different from others in a high degree of heating and convection of the body, which is made either of bricks (stone furnace) or of thick-walled metal. This heater is equipped with a water circuit, connected to radiators and get an almost complete economical heating system.
The author of the homemade product suggests making our version of a jet furnace out of an empty propane cylinder. A small modernization, a minimum of parts and before you is a great option for a heating furnace for a production workshop!
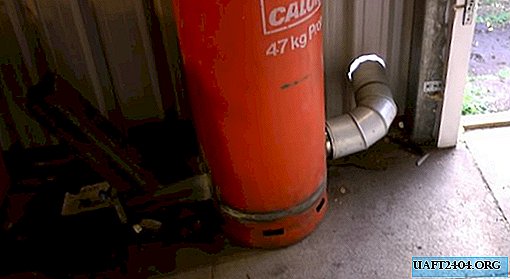
The principle of operation of the furnace
The furnace consists of a firebox, a heated tank and a chimney. The firebox is made in the form of a bent pipe in which the combustion of firewood occurs in its lower part. Hot air rises through a vertical pipe located in the center of the heated tank, which in our case is made of a gas cylinder. Rising up, hot air heats the walls of the tank, and gradually cools down, leaves the bottom through a chimney, which creates air convection and draft in the furnace.

Materials:
- Propane gas bottle;
- Square pipe welded from paired corners;
- Metal corner 50x50x5 mm;
- Round chimney pipe with swivel bends;
- Auxiliary metal elements: plates, trimming angles, plugs.
Instruments:
- For metal cutting: inverter plasma cutter or grinder with stripping and cutting discs;
- Welding machine;
- Metal straight corner, tape measure, marker for marking;
- Bubble level, hammer, brush for metal.
Making a rocket stove
Before you start work, you must remember that gas cylinders are extremely flammable and explosive. They must be thoroughly rinsed with water that has been left standing for a while in the cylinder, since even small residues of liquefied gas during cutting can cause the container to explode.
Cooking balloon
Household propane tank consists of a neck, a shell and a bottom. Usually it is placed vertically, so that the stop valves remain in a very prominent place in the center of the cylinder. It is necessary to get rid of it by lightly tapping it with a hammer.


Having unscrewed the fitting with an open-end wrench, we fill the cylinder with water to wash off the remnants of the liquefied gas. We leave the water to stand for a while, and then gently overturning the container, drain it. Even after such measures, we transfer the bottle carefully to the place of processing. Using a plasma cutter, cut off the bottom of the container.


We cut the pipes and scald the firebox
The next step is to cut metal corners according to the size of the loading chamber, furnace and duct. We cut them with a grinder or a plasma cutter, and boil each of them along the ribs.
Connections will be located at different angles. The dimensions of these elements are as follows:
- Vertical duct - 900 mm;
- Horizontal firebox - 500 mm;
- Feeder or loading chamber - 400 mm.
A furnace with an air duct is connected perpendicularly. We cut off the ends of these pipes on a mustache at 45 degrees, and boil on all sides of the pipe. Since the metal during the welding process heats up above 1500 degrees Celsius, it can lead. Therefore, it will not be superfluous to check the accuracy of the connection with a metal corner.


The location of the loading chamber will be inclined, so the feeder pipe must be cut at an angle of less than 45 degrees. We expose it to the fuel pipe a few centimeters from the edge of the furnace, where an ash pan will subsequently be located. By marking the cross section of the pipe, make a slot at the junction of the elements, and boil it in place.


The fuel box must be level, and securely fastened. A small segment of the corner, from which the pipes were made, will serve as its support. We cut it exactly to the size, and put it on the bottom of the container, checking the identity of a flat line between the planes of the container with a metal corner.
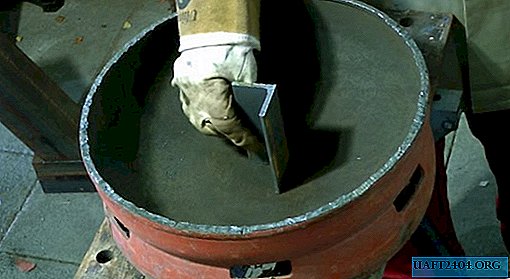


We boil the firebox, reinforcing the vertical duct pipe with metal plates or corners. We mark the seat for it on the wall of the cylinder, and make a slot with a plasma or grinder. The more accurate the cut will be, the easier it is then to scald.


We expose the firebox so that the vertical pipe inside the cylinder is located strictly in the center. We weld the bottom and the nozzle of the furnace with a welding machine.


An ordinary bolt or similar piece of metal will help to muffle the hole at the top of the cylinder. We insert it into the hole, and weld to the cylinder. You can grind the seam with a grinding disc and grinder.


Install the chimney
In the lower part of the cylinder, on the opposite side of the furnace, we mount a chimney. Mark the landing hole of the nozzle with a marker, cut out a circle in the wall of the cylinder, and scald along the contour.


Blown out the ash pan by a removable lid with a heat-insulating handle. For convenience, it can be looped. Through this hole, it will be most convenient to ignite the wood in the stove.


Pipe withdrawal outside the workshop. The higher the chimney pipe, the better the draft in the furnace. Now your workshop will always be warm and cozy all year round!


Share
Pin
Tweet
Send
Share
Send

