Share
Pin
Tweet
Send
Share
Send
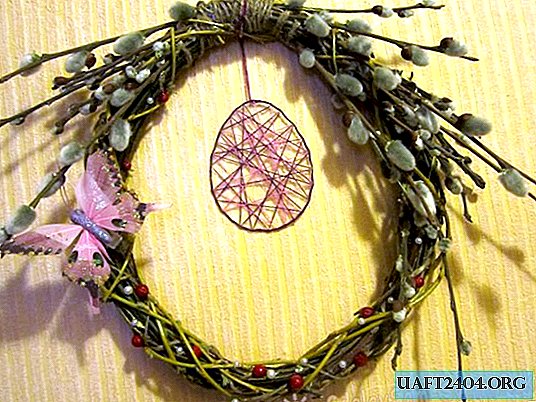
To work, you will need:

- pendant template (the most relevant and simple in this case is an egg);
- cardboard cover from the box (for fixing the template);
- colored threads;
- cling film;
- sewing pins;
- PVA glue;
- brush;
- scissors.
Stage 1. Preparatory - we fix the template for the suspension on the "working surface".
As a "working surface" will be a cardboard cover from the box. It can also be just a box, a piece of polystyrene foam or any other not very thick and easily punctured surface.
First, a sheet of paper with a drawn (or printed) contour of the future pendant is fixed to the working surface with cling film in one layer.

Next, using sewing pins, we designate the contour of the pendant, piercing the base according to the template on top of the cling film. The frequency of the location of the pins depends on how small it is planned to make a "spider line" pattern of threads.


Stage 2. The main - we form a patterned pendant.
After the contour is completely marked with pins, we circle it along the outer edge with a brush dipped abundantly with PVA glue.

Until the glue has dried, take the free end of the thread of the same color and wrap it several times around one of the pins on the "top" of the template. In this case, it must be ensured that it is well saturated with glue.

Holding the beginning of the thread at the base of the pin, wrap the entire outline of the template several times, pulling the thread slightly. Additionally, you can slightly lubricate the upper layer of thread with a small amount of glue, so that the contour turns out to be more dense.

Next, from any point, we take the thread in arbitrary directions, forming a patterned "spider line" inside the suspension loop, blotting the thread with glue. In this case, it is not necessary to completely wrap each pin. It is enough to "bend around" and additionally lubricate with glue.


Having finished forming a pattern from a thread of this color, its free edge is also fixed with glue.

Similarly, we make a “picture” with a thread of a different color. Remove excess glue with a brush or napkin.

Stage 3. Final - draw up the suspension.
When the desired pattern is made, the excess glue is removed, we leave the future suspension for a while until the glue completely dries. We remove the pins and separate the suspension from the working surface. Thanks to cling film, this is very easy.


We cut off the unnecessary ends of the threads, we clean the suspension from the possibly remaining adhesive films.

We tie the thread at the top.

And we use the finished product for its intended purpose - we decorate the interior for the holiday.

Making such Easter pendants is very easy. Different thickness of threads, bright colors, additional decorative elements will diversify each pendant, and make the design even more interesting.
Share
Pin
Tweet
Send
Share
Send

