Share
Pin
Tweet
Send
Share
Send
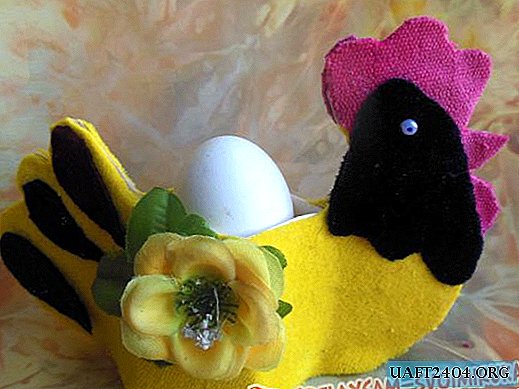
First of all, it is necessary to prepare bright and dense fabrics that, when cut, will not fray or open (this is velor, velvet, drape, felt). There are enough 5 color options, where the main ones are red (you can also use pink or burgundy) for scallop and yellow for covering the body of a bird. The remaining fabrics are needed only for additional decor. We also include two beads (chicken eyes) and a small artificial flower. Parts can be glued with any contact universal adhesive.

Choosing a framework and creating a template is the next step in preparation.

Cardboard may well be a firm base, but drawing a sketch of a chicken without a "cheat sheet" is very problematic. Therefore, use a ready-made drawing (this will save time for more productive work).

Now that everything is ready, it's time to draw the outline of the image on the cardboard and carefully cut it out.

The lines, which are dotted in the figure, on the cardboard blank are bending points.


And one of the sides of the side triangles located on the bottom is also a notch line. That is, you need to cut each line adjacent to the body, so that when folding the two parts of the tail and head are tightly connected.

If everything worked out correctly and the parts came together evenly, glue the connecting triangles with glue and glue on the lower border of the body. Then glue the tail and head.


Then cover the chicken on both sides with a yellow cloth. To do this, cut a large paper sketch and fix it on the fabric with pins.

The soft silhouette should be the same size as the paper one, because you don’t need to twist the edges or subsequently process them.

Attention! Always do all paired parts in a mirror projection.

Now grease the flat surface of the still unprocessed chicken with glue and attach the fabric (on both sides).


Break the template into small details and draw feathers separately.


First, glue the red head, and on top of it the colorful plumage of the neck. It will be better for the tail to make feathers better than different colors and sizes.


Finally, the final stage - bead eyes and a decorative flower.


The chicken is ready for Easter! This is an unusual addition not only to your table, but also to your mood.

Share
Pin
Tweet
Send
Share
Send