Share
Pin
Tweet
Send
Share
Send
So, we begin and we take the following:
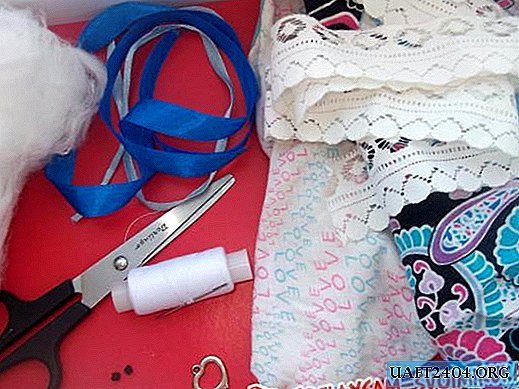
• Red cardboard A4 format, two sheets;
• Volumetric postcard scheme;
• Circles monophonic red and color;
• Different pictures with flowers, birds, flower baskets;
• Butterfly puncher and various sheets and scrap paper scraps;
• Cardboard cuts of different colors and sizes in the form of flowers, inscriptions;
• Latex roses red and white;
• Stamens with glitter pink;
• The stamped inscription "Happy Birthday";
• Satin pink ribbon with white hearts;
• Watercolor paper;
• Double-sided cattle and glue stick;
• Scissors, pencil, ruler;
• Glue gun.

So, we lay out the scheme and first cut off a large rectangle of 19 * 30 cm.


We completely transfer the scheme to the cardboard and make where necessary cuts, and where necessary we draw bending lines.


The base is ready, then it is folded like this into a postcard measuring 14 * 19 cm. Now we take a scrapbook paper and for each edge of the base we will cut out our scrapbook rectangle.


For the big side, cut out two 6.5 * 18.5 cm rectangles from two different papers. For the bottom of the postcard there are three rectangles 6.5 * 10.5 cm.


For the hanging sides, we cut out six rectangles of 6.5 * 7.5 cm. All parts are ready.


We glue part of the blanks directly to the base on double-sided tape.


The remaining six and circles will be decorated with pictures and inscriptions. We try on the pictures to the blanks like this. We tint the edges of all the elements with an ink pad.


We glue the circle onto the circle, then the picture and the inscription “Happy Birthday” and put all the other parts on double-sided tape. Now each element needs to be sewn with a typewriter.


Now the remaining blanks with pictures are glued to the base. We flash each part of the card separately.


Now on the diagram we look at the crossbar diagram and from the scrapbook paper we make three partitions. Glue the card along the side ponytail.


Glue the circle on top and glue the partitions with glue stick.


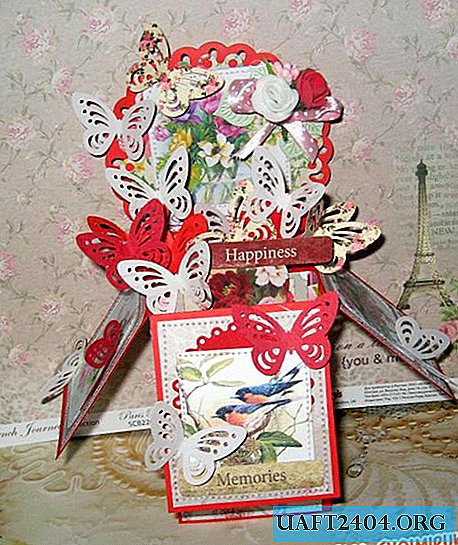
The card was fully assembled, now we will decorate. There are many different butterflies made of cardboard and scrapbook paper, or you can buy them ready if there is no hole punch.


We make a bouquet of roses with stamens, tie a bow from a ribbon. We glue cards on the partitions, and already on the cards we glue flowers, butterflies and various cardboard die cuts.


The card is fully decorated, it looks elegant and voluminous, so you can give a birthday. Thanks for your attention!


Share
Pin
Tweet
Send
Share
Send