Share
Pin
Tweet
Send
Share
Send
- no hoop needed;
- does not bend;
- the edges remain neat;
- not afraid of moisture;
- the thread lies flat;
- Suitable for teaching little needlewomen.
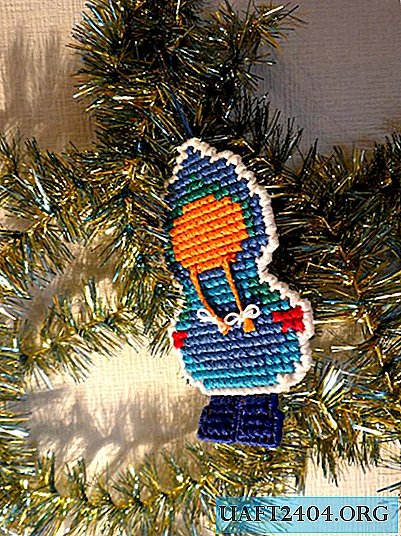


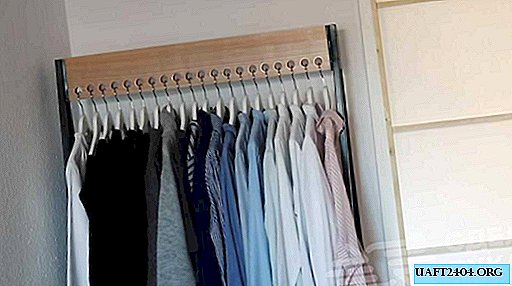
We suggest embroidering the Snow Maiden on such a basis for decorating a house or a Christmas tree. The toy will turn out two-sided, so it can be used to decorate the car’s New Year’s window or hang it from the chandelier.
You will need:
- plastic canvas - 20 to 30 cells, plus a bit of margin;
- thread floss - 1-2 skeins of each color;
- needle with a wide eye.

The toy will consist of the front side and the wrong side. Here are two patterns for embroidery.
Symbols in the diagram:
C is blue; G is blue; Z - green; O is orange; K is red; P is pink; H - black (for the eyes, I took a dark blue); St. - light (for the eyes - white, for example). You will also need a white color for stitching parts.


Take a thread of floss (of 6 thin threads) and thread into the needle in 2 layers so that a loop is formed on the end.

So we will fix the beginning of each thread. However, the toy is two-sided, and the inside will not be visible, so you can not try to arrange it too carefully.

Fasten the thread and embroider the first row diagonally with stitches from the lower left to the upper right.

When moving backwards, put the thread from the upper right corner to the lower left. All top crosses should have one direction.

Try not to deviate from the scheme. If you mix several crosses inside the figure, nothing bad will happen, but the outer edge is of great importance: when stitching parts, they should ideally overlap each other.

On the wrong side, fasten the thread by passing it through the others.


Embroider the front side according to the pattern. At the end of the work, cut the part, observing the condition: there should be one plastic cage near each stitch (for which you will sew the part to the part).


Sew details on the front of the toy: stars, bangs, smile.

Embroider the wrong side of the toy without departing from the pattern. From the bottom row of orange crosses, “braid” a charming girl two braids of thread of the same color, tie white bows.

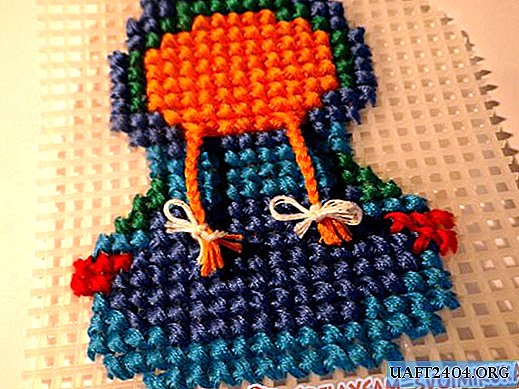

According to the scheme, embroider two felt boots and connect them together. With a movable connection, attach to the wrong side of one of the parts.


It remains to sew two parts! Do it carefully so that the plastic canvas is not visible, do not forget to do the stitch and diagonally when sheathing corners.


So, it remains only to attach the Snow Maiden a loop, and the charming New Year's messenger in a green scarf in a blue fur coat is ready.
Subject to some experience, work on the toy will not take more than a few hours, you can finish the toy in one evening. Your family will be delighted with such charming home-made gifts for the main holiday of the year!

Share
Pin
Tweet
Send
Share
Send