Share
Pin
Tweet
Send
Share
Send
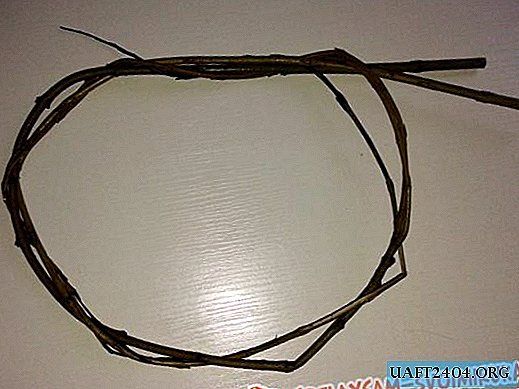
If Trapper wants to be made on a natural basis (usually willow branches), then you should prepare in advance. Tearing rods for work is better in the warm season, while they are young and plastic. Immediately after the rods are torn off, you need to twist the base circle out of them, and so that it exactly turns out smooth, you can put it on a vase or mug for the duration of drying, depending on size. The willow is dried for about a week, after which it can be taken as a weaver.
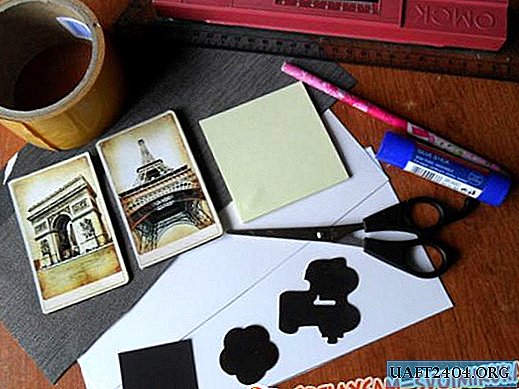
The rest of the materials will probably be found at home.
For the little Dream Catcher you will need:
- Willow (or any other) round base;
- Threads (thin yarn may come up);
- Beads (plastic, glass, wooden, from natural stones);
-Feathers.
And also scissors and a needle.
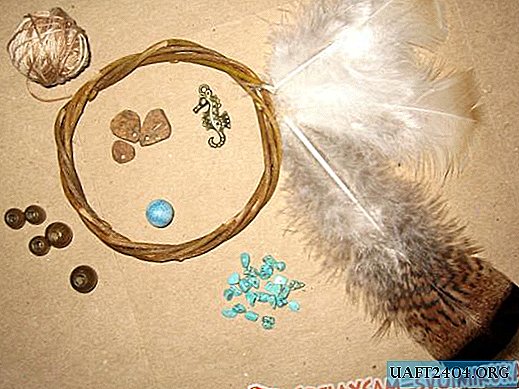
When all materials are selected, you can lay them on the table in the form of a future product - this will help to visually see the result and outline the location of beads, pendants and feathers. It's okay if not all selected materials are useful in the work.

The first step is the weaver’s spider web. It is necessary to cut the thread (not very long, but such that it is enough for the entire cobweb) and tie to the base. After that it will be possible to fasten the knot a little with glue for reliability. For convenience, the thread can be inserted into a needle or a needle to freely thread it through future weaving cells. The entire web in the catcher is woven without knots. The needle with the thread must be circled around the base, thread through the resulting loop and tighten.

Thus, you need to weave the entire first row, trying to ensure that between the "knots" was approximately equal distance. The thread should always be stretched - so that the cobweb is pulled tight and not deformed. However, it is important not to overdo it - if the base is made of twigs or branches, then it can bend. It is very simple to check if the base has started to deform, by laying it on a flat smooth surface.
The last loop-knot should be done at a small distance from the beginning of weaving (where the thread was tied). From this place begins circular weaving.

Then everything is simple - the main thing is not to go astray, tighten the thread and periodically, according to your taste and idea, weave beads and pendants into the cobweb, threading the thread through them. When the weave narrows to the center, a small hole will remain, the thread must be secured in a bundle, threading the thread twice in the loop, as when weaving, and tighten. The knot can be fixed with glue or hidden behind a bead.

The middle and main body of the Dream Catcher is ready. Now you need to attach the feathers - there can be three, one, or any other number of pieces. They can be pigeon, chicken or any other bird. For each, you need to cut the thread feather, snap and mask the tip of the pen with a bead - at the same time fixing the knot. Feathers can be tied close to the Dream Catcher or left on long strings, laces, decorating them with beads.

After all the feathers are suspended symmetrically, it remains to make a loop. You can hang the Dream Catcher on a cord suitable in color or make an uncomplicated loop of thread, decorating it with a bead. After that, Catcher is ready. It can be hung over the bed or even in the car.

Share
Pin
Tweet
Send
Share
Send